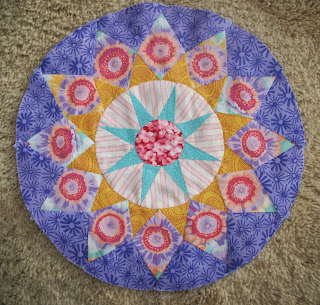
December 29, 2013

Yikes!

It’s been forever since I posted!  I have no good reason why either.   So painful to have to remember what I've been doing and catch you up!  (Have to did deep to find my memory first...)
 
Let's start with the two finishes (yes, only two since September.)  First up is the Granny Square quilt for my mother-in-law (which was supposed to be for Mother's Day, but what's a few month's difference?) 
 
This quilt has been one of THOSE projects right from the start.  Initially, it was supposed to be just a small, one block wide strip to liven up the back of another quilt....then it grew, and grew, and grew.

Front
You can see the unplanned growth in the borders.  First it was just going to be blocks straight to the edge, then I added cream blocks.  Then I added the colored blocks and more cream.  Then the straight scrappy edge, and I finally surrendered, found a cream that matched, and just added a plain border.

With each size increase, I had to unpick the edges, and add on more, and more.  All to make it fit the bed.  And then increase the back size too.
 

Probably should have skipped the straight scrappy edge or cut it off, but oh well. I first added it to try to square up the quilt after picking and unpicking all those bias edges. Probably just should have just added the plain border months ago and been done with it sooner! 


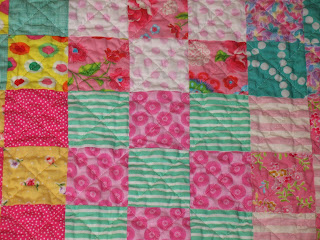
This is a close up so you can see Yvette's lovely quilting.  We used a wool batt which really showed off the quilting designs as it retained just a little puffiness after washing.

It is in the colors (dusty pastels) that my mother-in-law favors--and really hard to find today.  She seems to like it (more or less), although I should have included dusty pinks/mauves for her.  But it is done and after 1 1/2 years, and I'm grateful to not have to see it again!  (Or see some of the fabrics--like that back--that I've had for 20 years!)


I also finished another baby quilt, using the scraps from the previous post's quilt.  This is during the quilting process--just simple, straight lines across each square, marked with a hera marker at first, then I eyeballed it toward the end which seemed just as accurate.  My sewing room really isn't as dark as this makes it seem. 

 
Here's a close up view. 


 I had been unhappy with the waving edges on the baby quilt I finished in the prior post, and had theorized that the rippling was caused when I washed the quilt after it was finished and the batting shrunk, causing the machine stitched binding--which didn't shrink--to ripple. 

So I changed the method with this quilt.  I washed it after it was quilted, but before attaching the binding.  Here it is after the binding was attached.  Notice the awful rippling.  I was pretty bummed about it because it wasn't consistently rippled.  I have no idea why it occurred.


Since I had glue basted the binding, I had to wash it again before gifting it.  After the 2nd wash, all those ripples were gone and the quilt was perfectly square!  It was amazing!  So amazing, in fact, that I was so anxious to get it to the baby, I wrapped it up without a photo.  You'll just have to trust me that it worked.  (My husband was amazed at the change too--he's my witness!) 
 
Prewashing the quilt before adding a bias binding by machine is going to be my go to method now.  And the quilt is just an extra bit softer from the extra washing, too! 


This is the quilt back before the 2nd washing.  The crosshatching didn't line up perfectly with the squares on the back, but often did (which is just a miracle), and the differences I can live with. 

And those are the only finishes I can show you for the past 6 months.  Sad, I know.  Where does the time go?  Next post, I'll show you what I started--maybe!
 
Happy Quilting, Merry Christmas & Happy New Year too!

September 16, 2013

A Finish!

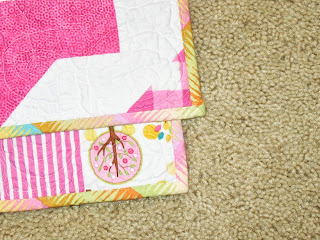
Hooray!  My Star Surround is finished!

The Star Surround was made during a wonderful quiltalong hosted by Melissa at Happy Quilting .  Melissa had such great instructions, it was an easy way to make a quilt. 

To see the parade of all the lovely finished quilts, go here.  It's fun to see how the different fabrics and different sized blocks change the way the design looks. 

Front
 
This isn't perfect, but I actually managed to quilt it myself, despite an angry shoulder.  Luckily the baby isn't a quilter (yet) so she probably won't notice the rough spots and longer stitches.   
 
Back
 
One thing I did learn (note to self), is if you make a two sided quilt, you have to have a design that works on both sides, and unless you can line the two sides up perfectly, you shouldn't plan on using straight lines or things that follow the blocks of the one side if the quilting won't look right on the other side. 
 
This swirly quilt design solved the problem and worked great for both sides. 


Also, if you choose a thread that won't show much, you shouldn't be surprised to find you can't see where you are at when you are quilting and lose track!  (This is Aurifil 50 wt.)

Another thing I learned is that when you use a batting that shrinks a bunch, it might be a good idea to wash the quilt after it is quilted, but before sewing the binding on.  The batt I used was Mountain Mist Blue Ribbon cotton, which I used to use years ago, but I don't remember that much shrinkage (or having to quilt as close as every 2 inches).

My quilt now has little waves in the binding area that weren't there before I washed it, and the shrinking was significant (it now measures 44 1/2", but it started out  at a finished 48" (in theory only since I didn't measure but it was close to that.)  I do like the old fashioned crinkled look the batting gave the quilt, though.

Putting the binding on by machine worked pretty slick.  After I stitched it on the first side, I used Elmer's School Glue to glue the other side in place then stitched it (hoping for the best) and except for one area, (and another I just noticed) it was perfect--well, good enough, and done beats perfect!

Now I just need the baby's name to make a label. 


I think this is the earliest I've ever finished a gift--the baby isn't even due until November.  Boy, it sure feels good to have finally finished something!  And thanks again, Melissa, for hosting such a lovely quiltalong!

Happy Stitching!

September 02, 2013

A different finish...

My Star Surround top should be finished by now.  It only lacks one final seam.  But my usual procrastination happened on the way to the finish. 

I thought I would work ahead and get the back ready.  I didn't have enough of the fabric I bought specifically for the back (and the mother-to-be).  So after much calculating, I figured out a way to piece it with minimum effort and keeping all the little people heads upright.  So, I grabbed the cutter and....cut the wrong fabric.  Whoops!  Definitely did not have enough fabric now.  What to do? Well make another Star Surround, of course. 

Now I have one Star Surround finished--just not the one I've been working on.  All little heads properly upright too.


I think I'll use it for the back of my original Star Surround--when I finally sew that last seam.  An unintended reversible quilt.  I hope it will line up okay for quilting, and not be too odd when it's finished if I get things off centered a bit.  (The colors look better in real life--we've a drab day here.)


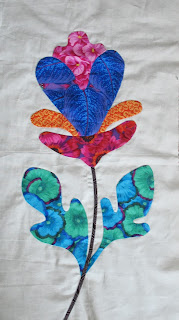
I also finished one more Flower Garden block.  With a little luck, someday I might just finish all the flowers.  I wonder how many more years it might take to finish the four borders....


And lucky me--I won a book!  Can hardly wait to put it to use on another new project! :) It looks like grand fun for making leaf shapes and especially the borders. 

Many thanks to Kathleen who blogs at Kathleen Murphy Designs (and who makes spectacular quilts that I often drool over with envy and admiration). 


The book uses the Leaves Galore Template.  Do any of you own these templates?  Which size would be best to get?  Or does it depend on the project?  Guess I better read the book first. :)

Happy Stitching!

August 25, 2013

A little progress...

A little more progress on the Star Surround quilt along--the blocks are sewn, and one row is together.  I'm a little ahead, but need to clean up the sewing room, so I'm anxious to get this done, or at least in one piece.


Also managed to finish one more Flower Garden block.


And managed to find the carpet in my sewing room.  Still have to dig out the cutting mat and my favorite scissors, though.  I'm sure they're under there somewhere.  And no, no photo of that--wouldn't want to scare you!

Happy Stitching!

August 18, 2013

Runaway Blocks

Last week I decided to work on my Flower Garden blocks.  I pulled out the background pieces for the unfinished blocks--7 background pieces were left.  I pulled out the patterns for the unfinished blocks--there were only 6 pattern pieces.  Yep, one was missing.

I keep my projects in bins containing the key parts, pattern, and fabrics for each (if possible).  If there is too much fabric, I put it in another bin, box or basket (or a big stack on the floor). I'm ordinarily a messy quilter, but my applique blocks are actually organized and in numerical order in a stack.  (they are too much work to lose!)  The applique blocks for the Roseville Album and Flower Garden have their own two bins--one for unfinished blocks, pattern, and parts, and one bin for finished blocks and backing/binding--and extra stem bias, because that's where it fits.  (It's what's wrapped around the piece of an orange swim noodle in the photo.)  Baby photos are nice, but the finished block bin is what I plan to save if our house ever starts on fire.

SOME of the WIP Bins
Finish block bin


So I went through the bins.  Went through them again.  Looked in any spot where the missing pattern could have been put.  Scanned the other bins. Looked again and again.  Finally, I got distracted with all the UFO bins and decided to look at the Flower Garden borders pattern pieces to see how much more work lay ahead.  That's when I realized I hadn't cut out the missing block's pattern--it was still attached to the border pattern.  Sigh.  Wasted hours.

In the midst of my pattern search, I checked off the completed blocks, so I'd know which one was missing.  Only problem, when I added the finished and unfinished blocks, I was still one short.  Not just a missing pattern, but the whole block.  Another half day search.  I went through everything.  Again.  And again.  I thought I remembered that this block had traveled on a plane with me.  Did I leave it somewhere in the process of stitching it?  Had it fallen behind somewhere?  Had I thrown it away?  I started wondering if I had ever stitched it? 

Truly disheartened, I gave up.  Sat down.  And looked on my blog.  Yep, there was a photo of the missing block.  Remember this block?

The Runaway Block

So where was it?  Hmmm.  I looked at what else I had posted about in that post, dug out that Raining Cats and Dogs bin, and voila--there it was, put away with those blocks.  Now I remember--I planned to wash the finished ones at the same time together. Now I know why I blog! (failing memory?!)

All blocks finally accounted for!  So much for making progress.  Do you ever lose things like this?  So frustrating.
Choosing Fabrics 


Eventually I did start working on the Flower Garden.


Prepped Blocks


I managed to get several of the remaining Flower Garden blocks all prepped and ready to take on our next road trip.  Some parts are glued under and some are front stitched, which I really like using on the leaves. I've even started stitching a little on a couple of them.


Last Flower to Do!


One more is in process--it just needs the tulip flower to be added.


Finished Block!


And I finished stitching one block!  (It is laying on top of the quilt on the design wall which shows through--sorry)


The cleanest part of the room
 
I did make a big mess.  (This is just a tiny, tiny part of the mess.)  So today, I'll be cleaning up the room......getting ready for the next round of the Star Surround quilt along tomorrow.
 
So far I've resisted joining the Love Entwined BOM.  Not sure how long I can hold out--it looks like fun (and work!)  They just started month #3, so it isn't too late to join in.  Fun of a new project vs. responsibly working on all my UFO's. Decisions, decisions.  Are you going to do it?  A clean sewing room almost needs a new project, doesn't it? ;)  I'm going to have to think about it......

Happy Stitching!

August 15, 2013

Making Stars

I've been working a little on the Star Surround Quilt Along

In this week's directions, Melissa mentions how easy it is to get the pieces mixed up, and recommends laying out each star, so as not to get it mixed up.  And I did that carefully, because I'm the kind of person who does get things mixed up. 

Apparently laying them out properly wasn't enough for me.  This is my first one:

How did this happen?
Instead of this?

Eventually I got them all properly sewed together.  


I'm looking forward to next week's assignment--I'm anxious to see how it is going to look!  Sure wish I had my design wall available. 

I need to get busy on the triangles (at the current rate, it will be years, and the pieces are actually falling off faster than being sewn together.)   Sigh.  Maybe tomorrow--or not. :)


Happy Stitching!

August 08, 2013

The Geese Are Flying.....

Although fall isn't in the air yet (it is still hot hot), the geese are already flying.......


Got off to a slow start, but finally finished the geese for the Star Surround Quilt Along this evening.  It's not too late for you to join in--the directions are here.

I'm looking forward to next week, when we start sewing the blocks together.  And, HOORAY--found out this week that the baby I was hoping to give this to is a girl!

Happy Stitching!

July 31, 2013

Should be, Seem to be, and Actually Am Doing...

My last post was about what I'd been doing (while not posting).  But, I completely forgot to mention what I AM doing.

Should be doing:  No question, I should be working on a quilt I am making for a gift.  I'd show you, but I am keeping it a secret.  (You've seen it before--before I knew it was going to be a gift, but I don't want to remind someone)  And since I'm not doing it, what's to show anyway?  :)  It just seems so uninspiring and unexciting....even though it is close to being put together. 

And, decisions always get in the way of finishing.  I'm to the point of trying to piece the back, and don't like what I've done.  So I AM procrastinating about it.  If I wait long enough, won't it look better?

Seem to be doing:  In a prior post I showed the pink hexagon quilt, and mentioned I was Pinked OUT.  Cutting all those hexagons, left an abundance of pink, black and red scraps.  What to do? 

The garbage can beckoned.   I could not force myself to sew more pink and black together.  But being too frugal to throw away good scraps, I experimented with adding more colors--didn't photograph them, sorry. 

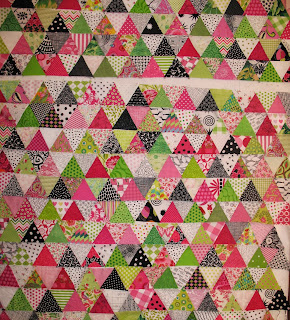
After much trying, I settled on lime-ish green as the antidote to pink.  I added some green triangles, some paler pinks, and some white/lights, and took out the reds.  I even had to buy some greens to have enough variety.  (This is an excellent example of how using up scraps just breeds more scraps and more UFOs.  Note to self:  Next time just give scraps away--you will have fewer and save money spent trying to make them work!)

This has been on my design wall for a couple months....


Progress is awfully slow.  Somehow sewing a row a week just doesn't seem to be accomplishing much.  But, I AM working on it--sometimes.

Actually am doing:  Yes, I AM actually doing something else.  Something unnecessary, but that just seemed more fun.  (Add one more unfinished project to the list.) 

I blame Heather who blogs at Happy Appliquer for my new project. :)  Heather blogged about a quilt along she was participating in.  It sounded fun, so I took a look--just a tiny peek actually.   (The Star Surround Quilt Along is being hosted by Melissa who blogs at Happy Quilting .) 

I only intended to read about it.  But Melissa had different sizes, all so organized.  I did need a baby quilt.  So I took another look.  And then another one.  The next thing I knew, I was back in the sewing room yanking fabrics out, trying to find 9 that looked good together.  (I wasn't going to buy new fabrics because I was just "seeing" if I could find 9).  A girl needs to use her stash, right?  I made a wonderful mess.

Stack One

Stack Two
Pretty soon I had a big stack of fabrics I liked--far more than 9.  In fact I ended up with two stacks of girly fabric.

Then another stack for a boy.  Since I don't know if the baby is a girl or boy, maybe I could make two?  (No, No, NO!  Get real.  It will be a miracle to get even one finished.) 
Boyish Stack
Since I couldn't decide on only 9 fabrics, I went back to the instructions, and decided to make every fabric (except the background) different.  (Yay!  27 fabrics--more is always more fun!) 
 
Last night I cut out the fabrics.  In looking at the squares, I actually used only 26 fabrics.  In all of my stash, I did not have enough of the right green. (and several greens I did have are a newer purchase or are a bit of a stretch colorwise, which may get swapped out)  Guess that means I'll have to do some shopping for minty green.


Today I finished sewing the first step, the half square triangles.   Now I'm all ready for the next step!

Bunches of trimmings were left afterward.  I put these in a garbage can lined with an open fabric pillow/bag.  When it's full, it will be sewn closed and make a pillow for a kitty at the animal shelter.  Good for the kitty, uses up waste trimmings, and helps me use fabrics I wouldn't have used otherwise for the bag.  And, I can always tell myself that starting a new project is good for a homeless kitty. 
 
Cut, cut, cut!  Let's make a kitty more comfortable, right?
 

And now that I'm all caught up, I guess I'll go see what other trouble I can get into.  Maybe sew a row of triangles?  Doubtful.  But I could clean up a little, and see what happens.  Maybe some more scraps have been breeding, and I do need to figure out a quilt for Stack Two and Boyish Stack, don't I? 

No, I'll be good.  I'm going to work on a block for my Flower Garden quilt--if I can find it.....

 Happy Stitching!

July 26, 2013

Four months and ten things.....

It's been awhile--okay months--since I posted.  And no, I did not sew myself into the new machine--at least not yet.  It's just the longer I go without posting, the more difficult I find it to post again....as in where do I start.....what to say and so little seems of any real importance, but here goes my best shot.  Since my last post....

1.  We helped my daughter move to a new apartment.  Did you know that 2 flights of stairs are farther up than they were 20 years ago?  Good thing she is young.  I've already told her to seek other help if she decides to move again. Boot camp would be easier.  :)

2.  I finally finished this quilt which I gave to my mom for Mother's Day.  (Stripping Vine from the book, Material Obsession


Yvette quilted it wonderfully--hope you can see the detail. 

She went around each of the white dogwoods, invented a special design for the orange triangles that mimics the fabric pattern, and stitched each of the star centers differently in a way that coordinated with the fabrics.

A really lovely job!


This is the back. I pieced the back in stripes, hoping to give it a different, semi-Bohemian look.  I made the stripes before I decided to give it to my mom.  Definitely too modern for her, but orange and black are the local college's colors and she and my dad are very loyal boosters/fans, plus Mom's favorite color is teal.

My mom's comment on the quilt: "You should have just made the whole thing out of the border fabric--it is beautiful".  Oh well.  She isn't a quilter.

3. I finished this Bordered Diamond quilt for my sister and her husband.  They actually liked it and it looks nice in their bedroom. 


Again the quilting is by Yvette and wonderful.  She used a variegated thread and quilted each diamond differently.

The outer border fabric is the same one I used on another Bordered Diamond quilt I made for my aunt.  Even though the narrow border, binding and backing are all different, the quilts look very much alike. 


For the backing, I used an out of print fabric by Philip Jacobs.  Not sure of its name--maybe Lilac Rose?


4.  I repaired the Teal Quilt that I had given to my son and his wife for their anniversary last year.  Their dog had chewed on it along the border and had made a couple of holes farther in--my fingers are in one here.  I was pretty disheartened when they brought it back for repairs, and stuck it in a bin for several months while I thought about how to fix it.
  
 
Luckily, I was able to find each of the damaged fabrics on the front and back, and able to match up the pattern (I had a triangle left from the original cutting--cutting too much does have its benefits, as does having an outrageous stash).  Here are some finished photos with a couple of the patches circled.  Being able to match the fabric perfectly really helped the patches disappear.  The repairs really aren't visible unless you look closely, and if you see like me without glasses, you almost have to feel to find them.  And, I gave them the repaired quilt back for this year's anniversary. :)
 
back
front
 5.  I completed one King George III block:

 
6.  I made a table runner of some leftover blocks for my daughter's birthday.
7.  I made potholders for my sister and daughter, as a project to figure out machine quilting on the new machine (and I know I need much, much more practice and shouldn't have used such a contrasting thread color, but there is a certain freedom in sewing for people who don't sew and don't know how bad something is.) :)  

Front
Back
Unfortunately, I was trying to be efficient as I made these, so I cut them out in pairs, stacked them, and began to sew.  I finished quilting the first one, and looked around for the second.  It was nowhere to be found...I looked everywhere--twice--was very puzzled until I realized I had sewn the two potholders together, and left out the insulated batting.  Now my sister has one very thick potholder.
  
Whoops--two sewn together!
Front


9.  I made a little quilt/table topper for my daughter as a piece to practice different machine stitching styles on.  Most were very roughly done, but hey, practice is practice, and I worked on it late at night to finish it. In other words, don't be judgmental, as I know it is flawed (but it IS finished) :)

front
back


10.  And, finally, this is non-quilting and sad news.  I spent a few weeks nursing our dog, Tessa.  Sadly we lost her last month.  Rips my heart out--she was with us almost 14, or is it 15 years?  A long time, but way too short.

Tessa and her duck
Although I've never been a dog person, Tessa seemed to know that right from the start and was on her best behavior, always trying to please me.  I will always remember the time I did yoga, and she saw me laying on the floor for the first time.  Knowing it wasn't right for me to be laying flat on the floor, she ran over and laid next to my head trying to revive me.  It was quite funny and touching that she cared, and she didn't give up on trying to get me up, even as I moved through the yoga.  Later she (and her duck) did their version of yoga on my mat (below).


Tessa was a great fashion advisor, and had a wonderful sense of style:


She had to wear shoes on walks due to a bad foot.  The day she got to go into the store to pick the shoes out, she was very proud,  but we were both disappointed in the color selection in her size. (She wanted red or purple)  She tried to be a good sport about wearing them, even though she hated that they made her stumble as she aged and couldn't lift her feet as well.


Tessa lived her life fully and with exuberance until the end, despite many ailments.  This photo was taken on her last trip to visit my parents, just days before she became ill.
 
Tessa, May 2013
 She was such a special sweetie.  I still look for her around the house, and I miss her everyday.  I hope she was as happy with us as we were with her.  I can't imagine a better dog.  Love you Tessa!